Checking Blood Sugar: Meters and Continuous Glucose Monitors
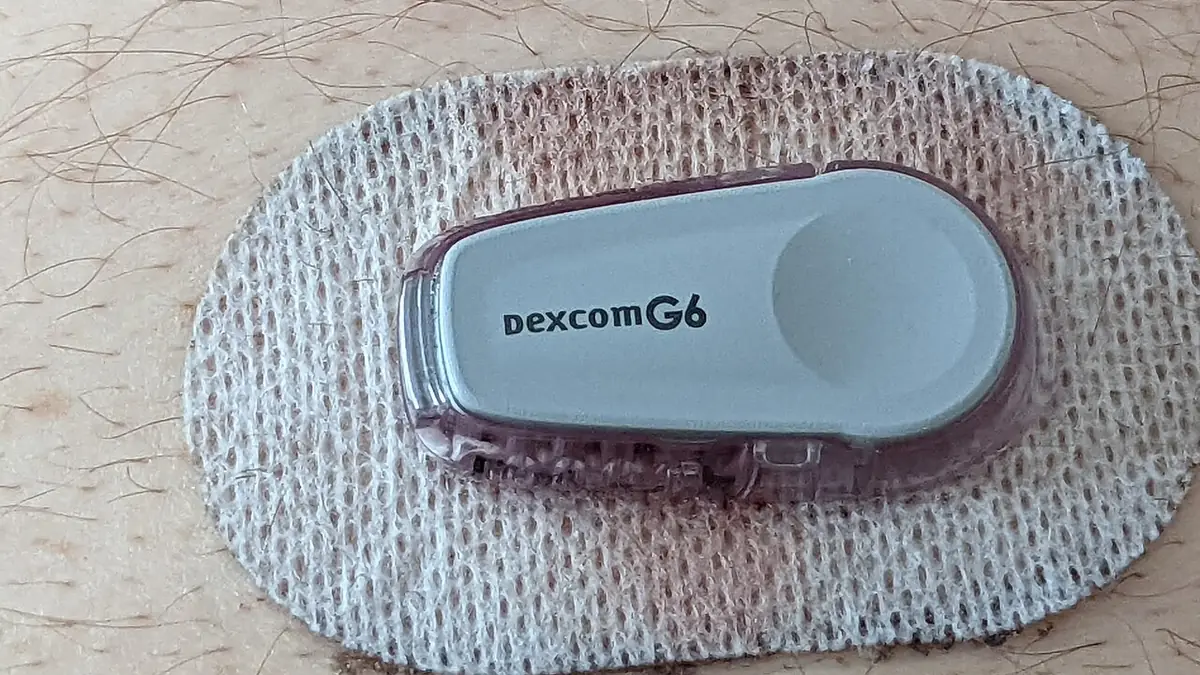
Checking your blood glucose gives you information you can act on: how food, activity, stress, illness, and medicines affect your levels. Today there are two main ways to do it at home: a traditional blood glucose meter using a fingerstick, and a continuous glucose monitor (CGM). This guide explains both, who benefits, how to get accurate results, and how to use the information. Your care team will tell you how often you should check and what your targets are.
Why check your blood sugar?
Monitoring helps you:
- See whether you are meeting your glucose targets
- Learn how meals, activity, and stress affect your glucose
- Make decisions about insulin doses, food, and exercise
- Catch and treat low or high blood sugar
- Give your care team data to adjust treatment
NIDDK's guide to knowing your blood sugar numbers explains how home checks complement the A1C test, which shows your average over about three months. See A1C and blood sugar targets.
Who needs to check?
How often you check depends on your diabetes type and treatment:
- People using insulin, especially multiple daily injections or a pump, usually need to check often, or use a CGM.
- People taking medicines that can cause lows, such as sulfonylureas, may be advised to check regularly, especially before driving.
- People with type 2 diabetes not using insulin may check less often, sometimes to learn how food and activity affect them, or during illness or medicine changes.
- People with gestational diabetes usually check several times a day. See gestational diabetes.
Ask your provider what schedule makes sense for you.
Common blood glucose targets
For many nonpregnant adults with diabetes, the American Diabetes Association suggests:
- 80 to 130 mg/dL before meals
- Below 180 mg/dL one to two hours after the start of a meal
Targets are individualized, and pregnant people, children, and older adults often have different goals.
Using a blood glucose meter
A meter measures glucose in a small drop of blood, usually from a fingertip.
Steps
- Wash your hands with soap and warm water and dry them well. Sugar on your fingers from food can cause a falsely high reading.
- Insert a test strip into the meter.
- Use the lancing device to prick the side of your fingertip, which is usually less painful than the pad.
- Touch the edge of the strip to the drop of blood.
- Read the result and record it, or let the meter or app store it.
- Dispose of the lancet safely.
Tips for accurate results
- Use strips that are not expired and have been stored as directed, with the container closed.
- Make sure the meter is coded or matched to the strips if required.
- Use control solution to check your meter when you open new strips or if results seem off.
- Do not reuse lancets more than recommended; dull lancets hurt more.
- Very high or low temperatures, dehydration, and some medical conditions can affect accuracy.
- Bring your meter to appointments so your provider can review the data.
Best times to check
Common times include when you wake up (fasting), before meals, one to two hours after meals, before bed, before and after exercise, before driving, and whenever you feel symptoms of a low or high. Paired checks, before and after a meal, can show how a particular food affects you.
Continuous glucose monitors (CGMs)
A CGM uses a small sensor inserted just under the skin, usually on the abdomen or the back of the arm, to measure glucose in the fluid between cells every few minutes. The data is sent to a reader, smartphone, or insulin pump. NIDDK's CGM guide explains how they work. Sensors are typically worn for about one to two weeks, depending on the device.
Benefits of CGMs
- Readings day and night without routine fingersticks
- Trend arrows showing whether glucose is rising or falling and how fast
- Alarms for high and low glucose, including overnight
- Reports such as "time in range" that show patterns
- Integration with insulin pumps in automated insulin delivery systems
Limitations
- CGM readings lag behind blood glucose by several minutes, especially when glucose is changing quickly. If symptoms do not match the reading, confirm with a fingerstick.
- Some devices still need occasional fingerstick calibration.
- Certain substances can affect some sensors; check the device information about medicines such as high doses of vitamin C or acetaminophen.
- Skin irritation from adhesive can occur.
- Cost and insurance coverage vary.
Over-the-counter CGMs
Some CGMs are now available without a prescription, designed for adults who do not use insulin. They can help people learn how food and activity affect glucose. Talk with your provider about whether one is useful for you and how to interpret the data.
Understanding time in range
CGM reports often include time in range (TIR), the percentage of readings within a target range, commonly 70 to 180 mg/dL. International consensus targets used by the ADA suggest that many adults with type 1 or type 2 diabetes aim for more than 70% of readings in range and less than 4% below 70 mg/dL. Your goals may differ. CGM reports may also show a glucose management indicator (GMI), an estimate of A1C based on CGM data.
Making sense of your numbers
Data is most useful when you act on it. Look for patterns rather than reacting to single readings:
- High after certain meals? Consider portion size, carbohydrate amount, or meal timing. See carb counting.
- High in the morning? It may be due to the dawn phenomenon, evening snacks, or medicine timing; discuss with your provider.
- Lows after exercise? Plan ahead with your care team. See exercise and diabetes.
- Frequent lows? Your treatment may need adjusting. See hypoglycemia.
Write notes about food, activity, stress, and illness next to unusual readings, or use an app.
Checking ketones
People with type 1 diabetes, and some others, should also know how to check ketones with urine strips or a blood ketone meter, especially during illness or when glucose is high. See hyperglycemia and DKA and sick-day management.
Getting help
Diabetes educators can teach meter and CGM skills and help you interpret data. Ask your provider for a referral to diabetes self-management education and support (DSMES).
Key takeaways
- Home glucose monitoring helps you and your care team make decisions and catch lows and highs.
- Meters use fingersticks; wash and dry hands and use good strips for accuracy.
- CGMs measure glucose every few minutes, show trends, and can alarm for highs and lows.
- Look for patterns and share data with your care team.
Sources
Links to the sources cited above appear in the text. We rely on the Centers for Disease Control and Prevention (CDC), the National Institute of Diabetes and Digestive and Kidney Diseases (NIDDK), and the American Diabetes Association (ADA).
Related guides: Blood sugar and treatment
- A1C and Blood Sugar Targets: Understanding Your Numbers
- Hypoglycemia (Low Blood Sugar): Signs, Treatment, and Prevention
- High Blood Sugar and Diabetic Ketoacidosis (DKA)
- Insulin Basics: Types, Delivery, and Safety
- Metformin and Common Diabetes Medications
- Managing Diabetes When You're Sick
- How to Lower Your A1C: Proven Strategies
- The Dawn Phenomenon: Why Morning Blood Sugar Is High